
Data import & export — the friendly Excel export, the migration-import workflow with validation and error-report round-trip, the Requestors/Risks/Vendors directory tabs, and document migration via the migration-staging container.
Last updated: August 06, 2026 by Steve
Data Import & Export
Settings → Data import & export is where AccessPoint backs up its own no-lock-in promise: a business-readable export of your caseload on demand, and a guided path to bring historical cases in from another system without an ETL engagement.
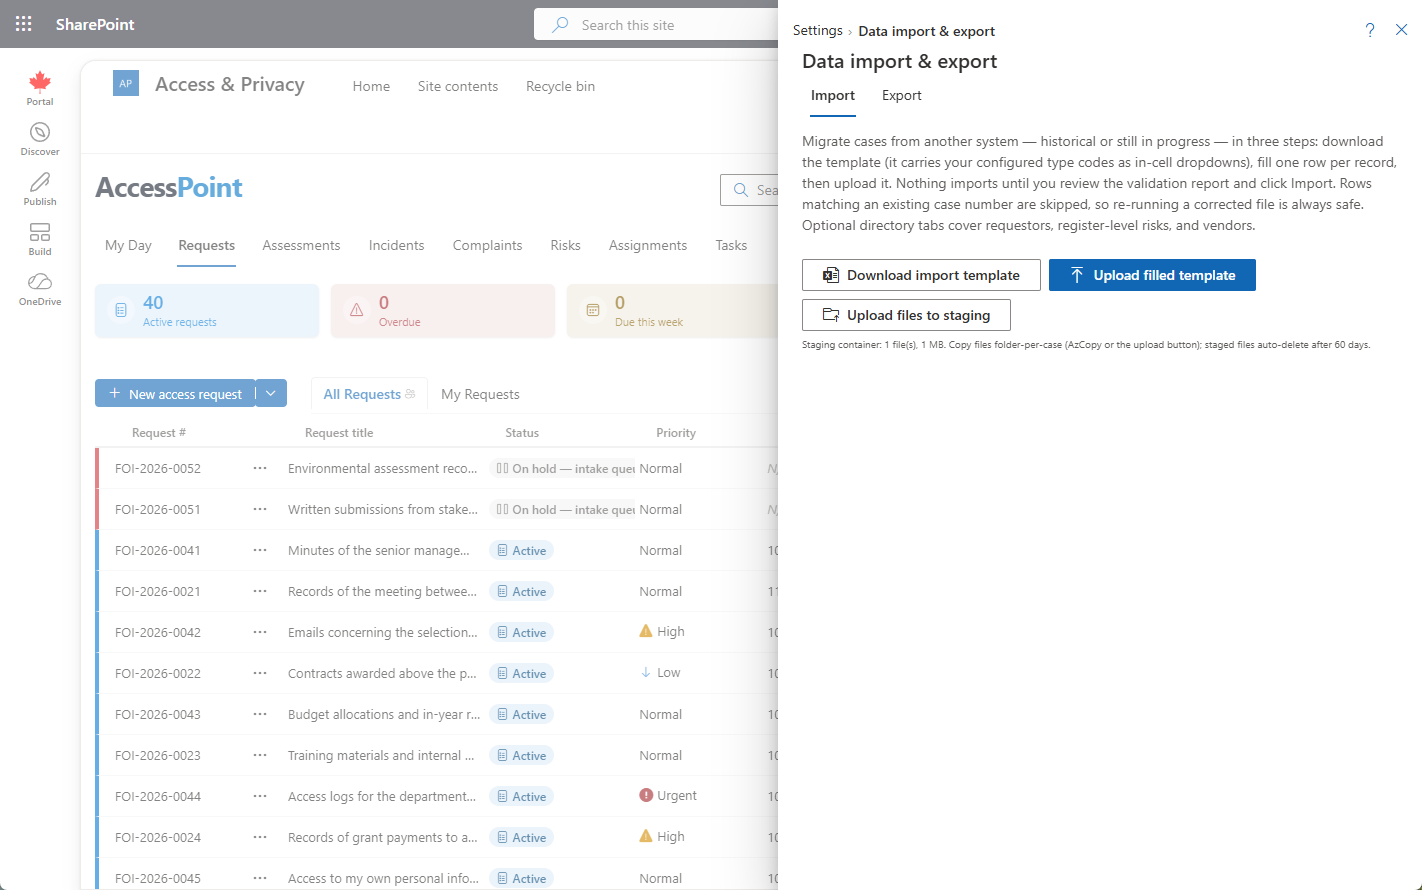
Where to Find It
Open Settings from the app toolbar and choose Data import & export in the Getting started group.
Your Data Is Never Locked In
Three things are true regardless of whether you ever use this panel:
- You own the database. Every AccessPoint table lives in the Azure SQL database in your Azure subscription. Standard Azure SQL export, backup, and query tooling all work against it — no vendor involvement required.
- Documents live in your own Blob Storage. Case documents, response packages, and case-audit exports are ordinary files in your own Azure Storage account.
- Export is one click away. The Export tab, below, produces a business-readable copy any time you want one.
Friendly Export
The Export tab produces a business-readable Excel workbook covering your requests, assessments, incidents, and complaints, plus the requestor directory, the register-level risk register, and the vendor register. Its tabs deliberately mirror the import template described below — so an export taken from one tenant validates cleanly as an import into another, which makes it useful for consolidating tenants or rehearsing a migration against a test tenant. (Statutory annual/quarterly report artifacts — the Excel/XML filings a jurisdiction pack ships a template for — come from the Reports area, not this panel.)
Migrating Historical Data
The Import tab migrates a historical caseload from another system, end to end, without a developer or an ETL tool:
- Download the import template. It's generated for your tenant, so its Reference tab and in-cell dropdowns already carry your configured type codes and stage values.
- Fill in one row per record, dates as
YYYY-MM-DD. - Upload and read the validation report.
- Import now to run it in the background.
Legacy Reference vs. Generated Numbers
Every imported row needs an identifier, and the template gives you two ways to supply one:
- Put the old system's identifier in Legacy reference — always, on every row.
- Leave Number blank in the normal case: AccessPoint generates an
IMP-prefixed number, keeping itself the single numbering authority. - Supply a Number only when your register or a published disclosure log requires the old case number to remain the official one. A supplied number is kept verbatim — and if it matches your tenant's configured numbering format, it automatically advances the sequence so newly created cases continue cleanly after it. The validation report tells you when a sequence advance happened.
Validation and the Error-Report Round-Trip
Uploading doesn't import anything by itself — it produces a validation report, per tab, showing what would be created, what would be skipped, and any row-level errors. Imports are strictly create-only: a row matching an existing case number is skipped without touching that record's data, which is what makes re-running a corrected file always safe. Download error report hands back your own workbook with an Errors column appended, so the fix-and-reupload loop stays inside the one file.
Historical by Construction
Once Import now runs (in the background — you can close the panel), imported records are deliberately inert on arrival: no notifications are sent, no reviews spawn, and no deadlines recompute. Supplied dates are stored exactly as given, and every imported record carries an Imported audit-trail entry so the provenance is always visible later. Requestors are matched to existing contacts by email (or created if unmatched); an access-officer email with no match falls back to the importing administrator.
The Directory Tabs
Three further tabs migrate the registers that sit around your cases, using the same create-only skip semantics:
| Tab | Skip key | Notes |
|---|---|---|
| Requestors | Email (else name) | Import requestors in the same workbook as their requests, and a Requests row sharing the email links to the full imported contact instead of a bare auto-created one. Institutions are matched by name, or created once per run. |
| Risks | Title | Register-level (standalone) risks only — a risk that belongs to an assessment or incident travels with that case instead. Category codes validate against your configured risk categories; likelihood, impact, and risk level are stored as given, since a migrated historical determination is a record, not something AccessPoint recomputes. |
| Vendors | Name | The vendor/processor register — role, contact, jurisdiction, DPA facts, contract end, risk level, and status. |
Migrating Documents
Legacy case files migrate through the pre-provisioned migration-staging blob container in your own storage account, listed on the workbook's Documents tab — nothing to provision, the container ships with the deployment template.
- Stage the files, folder-per-case (
LEGACY-42/All Staff Memo.docx): AzCopy for volume (it preserves your folder tree; add--put-md5to enable hash verification), the Azure portal's drag-and-drop, or the panel's own Upload files to staging button for smaller sets. Paths are unique by construction, so identical filenames on different cases never collide. - List each file on the Documents tab — the case it belongs to (a Number or Legacy reference, or an existing request), its staging path, and optionally a title, document type, date, and an MD5 content hash. When both the manifest and the staged blob carry a hash, the importer verifies them and rejects a mismatch — an optional chain-of-custody check.
- Validate both directions. Every listed path must exist in the container, and staged files that aren't listed are surfaced as a notice rather than silently imported. After adding files to the workbook, re-validate without re-uploading it.
- Import. Each listed file is copied into the normal document store and rides the same conversion/indexing pipeline as a native upload, carrying Migration Import provenance. A file already recorded on the case is skipped on re-runs.
Staged files auto-delete after 60 days — they're sensitive records sitting outside the normal document lifecycle, so the container doesn't hold them indefinitely by default.
Related Pages
- Retention Review — how AccessPoint later manages the disposition of the cases you migrate in.
- Requestors — the contact directory the Requestors tab populates.
- Privacy Subjects — the Vendors register the Vendors tab populates.
- Audit Ledger — where the
Importedprovenance on a migrated record shows up.